Showing posts with label cupcakes. Show all posts

Sunday, June 26, 2011

Chocolate Chip Cookie Dough Cupcakes

For the cookie dough:
2 sticks softened butter
3/4 cup sugar
3/4 cup brown sugar
4 tbsp milk
1 tbsp vanilla
2 1/2 cups all purpose flour
1/4 tsp. salt
1 cup mini chocolate chips
For the cupcakes:
3 sticks softened butter
1 1/2 cups light brown sugar, packed
4 large eggs
2 2/3 cups all purpose flour
1 tsp. baking powder
1 tsp. baking soda
1/4 tsp. salt
1 cup milk
2 tsp. vanilla extract
For the frosting:
3 sticks softened butter
3/4 cup light brown sugar, packed
3 1/2 cups powdered sugar
1/2 tsp. salt
2 tbsp. milk
1 tsp. vanilla extract
Directions:
To make the cookie dough, combine the butter and sugars in a mixing bowl and cream on medium-high speed until light and fluffy, about 2 mins. Beat in milk and vanilla until incorporated and smooth. Beat in the flour and salt until just combined. Stir in the chocolate chips. Using a 1.5 tbsp scoop, shape the dough into balls or tubes. Freeze on a parchment lined baking sheet overnight.
To make the cupcakes, preheat the oven to 350° F.  Line two cupcake pans with paper liners (24 total).  In the bowl of a stand mixer fitted with the paddle attachment, combine the butter and brown sugar.  Beat together on medium-high speed until light and fluffy, about 3 minutes.  Mix in the eggs one at a time, beating well after each addition and scraping down the sides of the bowl as needed.
Combine the flour, baking powder, baking soda, and salt in a medium bowl.  Stir together to blend.  Add the dry ingredients to the mixer bowl on low speed, alternating with the milk, beginning and ending with the dry ingredients, mixing each addition just until incorporated.  Blend in the vanilla.
Using a 3 tbsp scoop, fill the prepared cupcake liners 2/3 full with the cupcake batter. Place a frozen cookie dough ball on the top center of each cupcake.
Bake at 350 for 16-18 mins.
To make the frosting, combine the butter and brown sugar in a mixing bowl and cream on medium-high speed until light and fluffy.  Beat in the powdered sugar until smooth.  Beat in the salt, milk, and vanilla extract until smooth and combined.
Frost the cupcakes and sprinkle with mini chocolate chips!
Makes 24 cupcakes.


Friday, June 24, 2011

Coconut Cake Pops

Ingredients:
*1/2 of a 9x13 cake or one 9 inch or one 8 inch cake, baked and cooled. (Or half of what ever size cake you make out of one batch of batter.)Bakerella (cake pop creator http://www.bakerella.com/) likes to use box cakes, but I prefer scratch cakes. I used the Silver White Cake recipe below

*Frosting about 1/2 cup of frosting needed, but have a little more just in case your cake balls are to dry.  I used this buttercream recipe

Creamy Buttercream

Here is the recipe for the Creamy Buttercream.
Ingredients:
1 cup shortening
3 Tablespoons of Non-dairy Creamer
1 tsp vanilla
1 pinch of salt
3 1/2 cups of powdered sugar
Cream the shortening, creamer, and vanilla together until the liquids are incorporated and it is fluffy. Add the pinch of salt and powdered sugar and mix until fluffy. If you need a stiffer consistancy add more powdered sugar, and if you need it to be thinned then add a little creamer to thin.
*Coconut: 2 1/2 cups divided, 1/2 cup for mixing in the cake pops and 2 cups for decorating the outsides.

Makes about 40 cake pops (depending on what size you make the balls).


Step #1: Crumble cake
take your cooled cake (half of a 9x13 or half of what ever size you baked with a full batch of batter) and crumble it into a bowl into small pieces. I like to take too pieces of cake and rub them together. Or you can take a piece in your hand and crumble it into tiny pieces.
Step #2: Add 1/2 cup of coconut and mix them together.

Step #3 Add 1/2 cup of your favorite frosting. (If when you are mixing and making the balls if they don't stick together and are really dry then add a tiny bit more frosting, but not too much or it will make them supergooey and mushy.)

Step #4: Mix together until it sticks together. Then roll it into balls. If you want to be precise you can use a measuring spoons so when they are rolled the balls are all about the same size. You can choose which size you like best. My preference is just to eye it rather than use measuring spoons. I like mine to be 1 to 1 1/2 inches in diameter. Place the balls on a cookie sheet that is covered in parchment paper so they don't stick. Chill them in the fridge for about 2 hours. (You want them chilled not frozen so if you are in a bind and need them done sooner you can stick them in the freezer, but no more than 20 minutes or your chocolate will crack when you cover them)

Step #5: Once they are chilled you need to prepare your chocolate to cover your cake pops. I prefer coating chocolate, but you can use chocolate chips, or other types of chocolate (but you need to temper them). The best brand of coating chocolate is Merkins. I really don't like the Wilton brand, but it is doable if that is all you have access to. Just make sure you don't buy packs that the chocolate seems like it is stuck together, and you want to buy it when you need it because old chocolate doesn't melt well.
This is Merkins chocolate. You can buy it at party stores. It is sold in bins and you scoop out the amount that you need.
To melt the chocolate pour the pieces in a microwave safe bowl and microwave on high for 30 seconds and stir. You will need to microwave it again for 2o more seconds and then stir again. Repeat this process until the chocolates have melted, making sure to stir every time (And don't microwave for more than 20 seconds after the first time because if the temperature of the chocolate gets too hot then it will seize and you will have to throw it away. So be patient so your chocolate isn't ruined. ) If you don't use coating chocolate then your chocolate might be too thick for dipping. If you find you have this problem then melt about a tablespoon of shortening in the microwave in a separate bowl and add into your chocolate once melted and stir it in.

Step #6: Dip lollipop sticks in the chocolate and insert them in the cake pops a little less than half way in (no more than that or the ball might break). Once you have inserted them in quite a few pops then the first few should have hardened and are ready to dip. I like to put sticks in half of them and move them to new parchment and stick the other half back in the fridge to keep chilled. If they get too soft then they can break in your chocolate and make a big mess.
Step #7: Prepare something to hold your dipped pops. You can useStyrofoam that you have previously made holes in with a lollipop stick, or Wilton makes a cake pop holder you will see in my pictures down below (but it is really cheap cardboard and not worth what they ask for it so make sure you use the 40% off coupon from Michael's). Or if you are going to put them in mini muffin liners when they are finished or cake balls instead of cake pops then just put them back on the parchment after dipping them. You might need a little more parchment since the dipped ones can't be as close as non dipped ones.


Step #8 Dipping
To dip you want your chocolate to be deep so if needed move to a smaller bowl so the chocolate is deeper than the cake pop. Dip the cake pop in the chocolate and pull out straight up. DO NOT twist in the chocolate or the stick might come out. If your chocolate isn't quite deep enough just tilt the stick of the cake ball gently to each side until the chocolate covers the entire pop and pull out vertically.

Step #9: Remove excess chocolate
I turn the cake pop on it's side between my thumb and fingers and slowly spin the cake pop and use my other arm to tap the arm holding the cake pop (it helps the chocolate drip off).

Step #10: Toppings
Depending on how much you like coconut you can decided how you want to do your toppings. You can simply leave the cake pop blank with the chocolate if you don't like lots of coconut, or you can dip just the top of the cake pop in coconut, or dip all of the sides in coconut. You need to do it right away before the chocolate sets.


Step #11: Drying
Let the cake pops set up until the chocolate has set completely beforearranging it in what you are going to display them in. (As you can see the Wilton brand holder is kind of a tight fit some of the cake pops that are next to each other touch and solidify together so it doesn't really hold 40 since you need to spread them out.)

Here is an arrangement that I made with the Coconut Cream Cake Pops and Smore Cake Pops.
This is another way you can serve/display your cake pops. After dipping your cake pops then just place them back on your parchment paper and sprinkle the coconut on top of them or your can dip them in the coconut and then put them on the parchment, but make sure you sprinkle a little more on top so the part by the stick is covered. I put them in mini cupcake liners


Or if you want you can skip the stick entirely and make Cake Balls. When dipping either use chocolate dipping tools or a fork to help shake he ball to get the excess chocolate off and dry on parchment paper. Don't worry if there is a little excess chocolate that puddles around it. You can break that off after it has set.


The inside view of the Coconut Creme Cake Ball.


Thursday, June 23, 2011

Cupcakes in a Jar

Usually when I make cupcakes I like to use paper liners and 
only make 18 per box because bigger cupcakes are better, right?

But for the mason jars, I skip the liners 
(then I don't have to take them off and there 
are no ridges showing in the jars) 
and I spray the cupcake pans with Pam.

I also make 24 cupcakes which work perfectly for the dozen jars 
that I am using, as well as the size that fits best inside.

While the cupcakes were baking I made the frosting.

Here is the C&H 5 minute buttercream recipe I use:

1 box powdered sugar
1 stick salted butter at room temp.
1/4 cup milk
1 tsp. vanilla

Combine and beat until creamy.

Now you have no excuse to by frosting at the store again!


When the cupcakes have cooled, place one with the bottom side down, into each jar.

I have found it easiest to put the frosting in a ziploc bag, 
snip a hole and pipe it into the jars.

Put another cupcake on top of the first layer of frosting,
add even more frosting,
screw on the lid.


Caramel Apple Cupcakes in a Jar

  • Duncan Hines Apple Caramel Cake mix, follow directions right on the box for making cupcakes. (You can either spray your pans and bake with out liners, or remove liners later .)
  • Cinnamon Butter Cream (recipe below)

Cinnamon Buttercream

  • 1 cup (2 sticks) butter, softened
  • 2 Tablespoons whipping cream (you can use milk, I just like whipping cream)
  • 1 teaspoon Vanilla or Almond Extract
  • 1 teaspoon cinnamon
  • 4 cups powdered sugar
  • 2 Tablespoons light corn syrup
  1. In a large bowl, beat butter, milk and vanilla on medium low until smooth and combined (about 1-2 min), scrapping sides of bowl as necessary.
  2. Add cinnamon, then slowly add powdered sugar one cup at a time on low until combined, scrape sides of bowl.
  3. Increase speed to medium, and beat for 1 min.
  4. Add corn syrup and beat on med high for about 30 seconds, then increase speed to medium high and beat for about 1 minute.

How to Make Cupcakes in a Jar

What you need:
  • 1 pint jar
  • 3 Apple Caramel cupcakes 
  • Cinnamon Buttercream
  • start with dropping one cupcake inside the jar, then using your icing bag and tip, squeeze buttercream on top of cupcake.........repeat until you have 3 layers.  I have also used smaller jars and cut the cupcakes in half. * I sprinkled a little cinnamon and sugar on the last layer of buttercream.

Tuesday, June 21, 2011

Caramel Corn Infused Devil’s Food Cupcakes with Caramel-Caramel Corn Buttercream Frosting

Caramel Corn Milk (you will need this in both recipes)
3 cups whole milk
3 cups crushed caramel corn (homemade or store bought)
Bring 1 ½ cups milk and caramel corn to a simmer in a medium saucepan over medium heat. Once milk starts to bubble take off of heat and let sit for 30 minutes.
Add remaining milk and place in fridge for 24 hours.
Remove from fridge and run milk through a strainer. Discard caramel corn.
Caramel Corn Infused Devil’s Food Cake
3 cups all-purpose flour
1 1/2 tsp. baking powder
1 1/2 tsp. baking soda
1/4 tsp. salt
12 TBSP unsalted butter, at room temperature
2 cups firmly packed light brown sugar
3 large eggs, separated, at room temperature
9 ounces unsweetened chocolate, melted (use a double boiler)
*2 cups caramel corn milk
1 1/2 tsp. vanilla extract
Preheat oven to 350 degrees F. Grease and lightly flour two muffin pans (hold 12 cupcakes each)
In a small bowl, sift together the flour, baking powder, baking soda, and salt. Set aside.
In a large bowl, on the medium speed of an electric mixer, cream the butter until smooth. Add the sugar and beat until fluffy, about 3 minutes.
In a separate small bowl, beat the egg yolks until thick and lemon-colored, about 2 minutes. Add the beaten yolks to the butter mixture and beat well. Add the chocolate, mixing until well incorporated. Add the dry ingredients in three parts, alternating with the caramel corn milk and vanilla. With each addition, beat until the ingredients are incorporated, but do not overbeat. Using a rubber spatula, scrape down the batter in the bowl, making sure the ingredients are well blended and the batter is smooth.
In a separate small bowl, beat the egg whites on the high speed of an electric mixer until soft peaks form. Gently fold into the batter. Divide the batter among the prepared pans.
Bake for 20-22 minutes, or until cupcakes spring back when you touch them. Let the cupcakes cool in the pans for 1 hour. Remove from the pans and cool completely on a wire rack. Frost and top with extra caramel corn if desired.
Caramel-Caramel Corn Buttercream Frosting
1 cup unsalted butter, at room temperature
½ cup prepared caramel sauce (can be store bought)
6 cups powdered sugar
1/2 cup caramel corn milk
1 tsp. vanilla extract
Place the butter and caramel sauce in a large mixing bowl. Beat on medium speed for about 2 minutes, until thoroughly combined.
Add 4 cups of the sugar and then the caramel corn milk and vanilla.
On the medium speed of an electric mixer, beat until smooth and creamy, about 3-5 minutes.
Gradually add the remaining sugar, 1 cup at a time, beating well after each addition (about 2 minutes), until the icing is thick enough to be of good spreading consistency. You may not need to add all of the sugar. (Use and store the icing at room temperature because icing will set if chilled.) Icing can be stored in an airtight container for up to 3 days.

Chocolate Cupcakes with Chocolate-Coconut-Pecan Buttercream

Chocolate Cupcakes
2 cups All-Purpose Flour
1 tsp. baking soda
1 cup unsalted butter, at room temperature
1 cup granulate sugar
1 cup brown sugar, firmly packed
4 large eggs, at room temperature
6 Oz unsweetened chocolate, melted
1 cup buttermilk
1 tsp. vanilla extract
Preheat oven to 350˚F.
Line two 12-cup muffin tins with cupcake papers.
In a small bowl, sift together the flour and baking soda. Set aside.
In a large bowl, on the medium speed of an electric mixer, cream the butter until smooth. Add the sugars and beat until fluffy, about 3 minutes.
Add the eggs, one at a time, beating well after each addition. Add the chocolate, mixing until well incorporated. Add the dry ingredients in 3 parts, alternating with the buttermilk and vanilla. With each addition, beat until the ingredients are incorporated but do not overbeat.
Using a rubber spatula, scrape down the batter in the bowl to make sure the ingredients are well blended and the batter is smooth. Carefully spoon the batter into the cupcake liners, filling them about ¾ full. Bake for 20-25 minutes, or until a cake tester inserted into the center of the cupcake comes out clean.
Cool the cupcakes in the tins for 15 minutes. Remove from the tins and cool completely on a wire rack before icing.
Chocolate-Coconut-Pecan Frosting
1 1/2 cups (3 sticks) unsalted butter, at room temperature
2 tablespoons milk
9 ounces semisweet chocolate, melted and cooled
½ tsp. vanilla extract
½ cup finely shredded unsweetened coconut
¾ cup finely chopped pecans
2 1/4 cups sifted powdered sugar
To melt the chocolate, place in a double boiler over simmering water on low heat for about 5-10 minutes. Stir occasionally until completely smooth and no pieces of chocolate remain. Remove from the heat and let cool for 5-15 minutes.
In a large bowl, on the medium speed of an electric mixer, beat the butter until creamy, about 3 minutes. Add the milk carefully and beat until smooth.
Add the melted chocolate and beat well, about 2 minutes. Add the vanilla and beat for 3 minutes. Add the coconut and nuts and blend until fully incorporated.
Gradually add the sugar and beat on low speed until a desired consistency is reached.

Monday, June 20, 2011

Brownie Bites with PB Frosting

Brownie Bites
1 boxed brownie mix (I think chocolate cupcakes would be yummy too)
1 cup Reeses Peanut Butter chips (optional)

Peanut Butter Frosting
1/2 cup butter, softened
1 cup creamy peanut butter
3 tablespoons milk, or as needed
2 cups confectioners' sugar

Make brownie mix according to package directions. Add peanut butter chips if desired. Pour into paper lined mini muffin pans filling each cup about 3/4 full. Bake 14-18 minutes at 350 degrees or until toothpick comes out clean. Cool.

Place the butter and peanut butter into a medium bowl, and beat with an electric mixer. Gradually mix in the sugar, and when it starts to get thick, incorporate milk one tablespoon at a time until all of the sugar is mixed in and the frosting is thick and spreadable. Beat for at least 3 minutes for it to get good and fluffy. Frost brownie bites with frosting. 

Sunday, June 19, 2011

Red Velvet Cupcakes in a Jar

Ingredients:
- 2 1/2 cups all-purpose flour
- 1 1/2 cups sugar
- 1 tsp baking soda
- 1 tsp salt
- *2 1/4 tsp cocoa powder
- *1 1/2 cup canola oil
- 1 cup buttermilk, room temperature
- 2 large eggs, room temperature
- 2 tbsp red food coloring
- 1 tsp white distilled vinegar
- *2 tsp vanilla extract

for the cream cheese frosting:
- 1 pound cream cheese, softened
- 2 sticks butter, softened
- *2 tsps vanilla extract
- 4 cups sifted powdered sugar

1. Batter is ready to be put in cupcake pan.
baking cupcakes

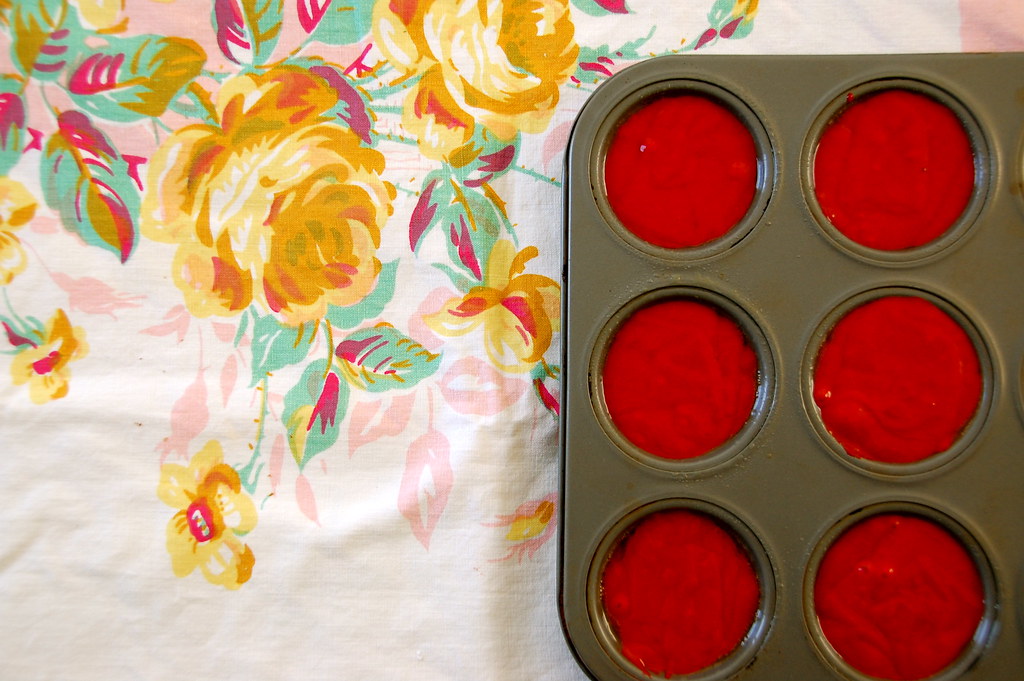
2. I spray the pan with PAM and then fill each hole up 2/3 with the batter. 
cupcake pan

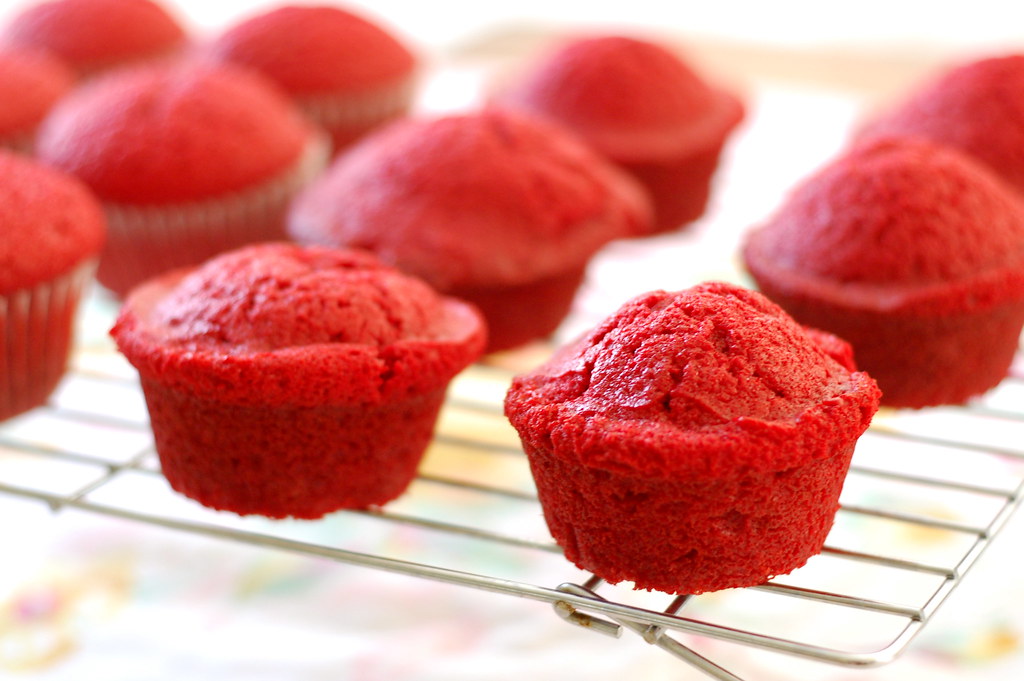
3. Usually they are done after about 17 minutes in my oven at temperature of 350℉,  put them on a wire rack to cool completely.
cool down

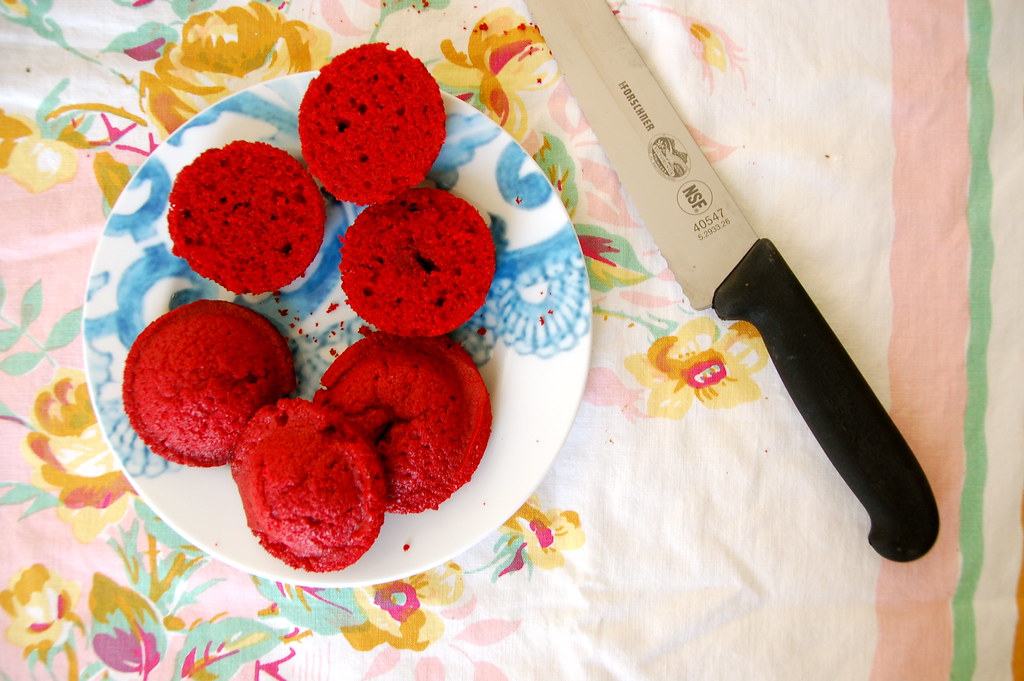
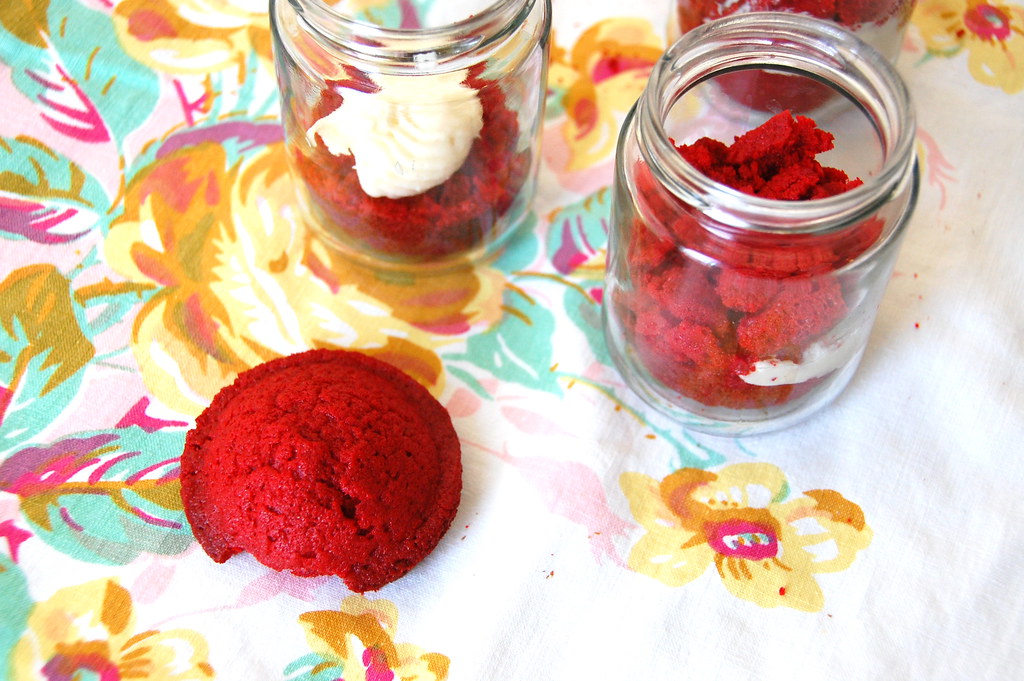
4. Once they are cool, slice them in half. You will have a stack of tops and a stack of bottoms.
sliced in half

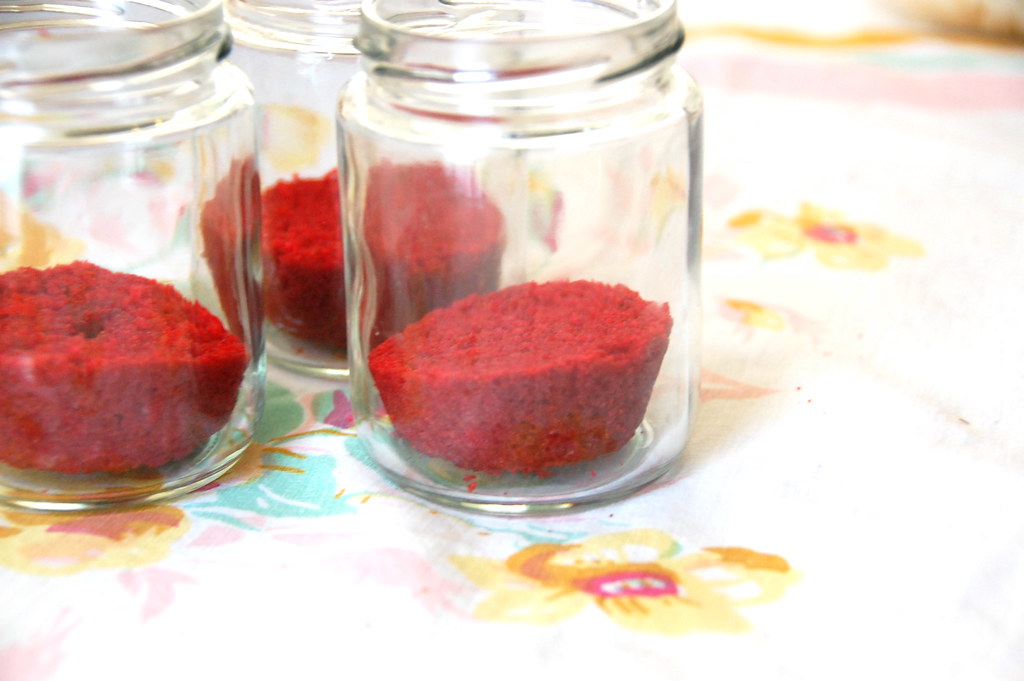
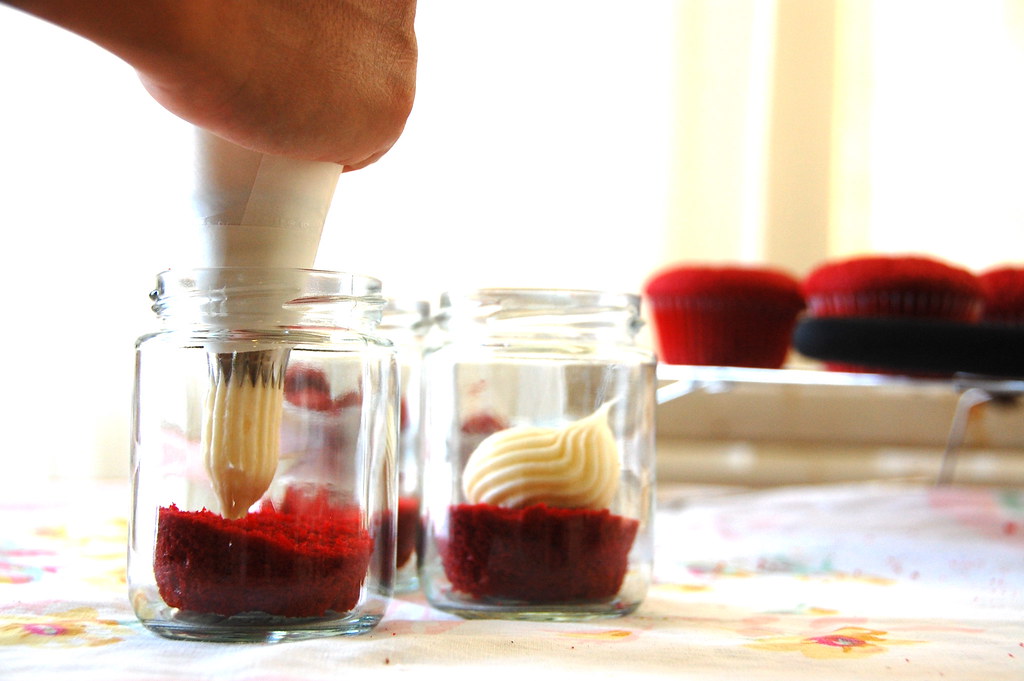
5. Place 1 bottom in each jar.
bottom of the cupcake

6. Put a layer of the frosting.
frost the middle

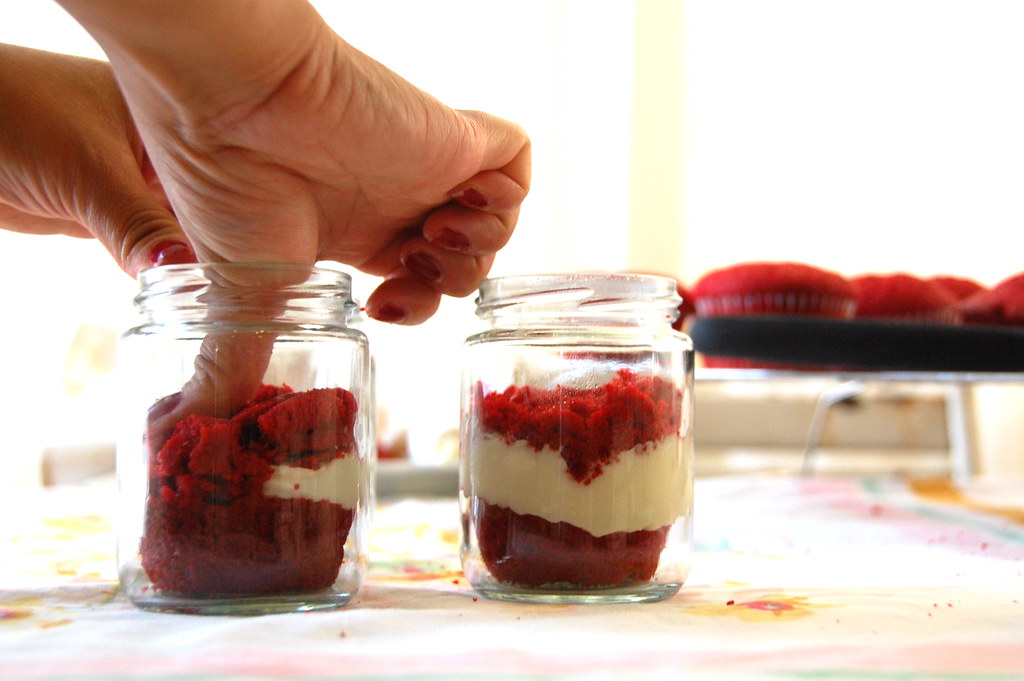
7. Take the top of the cupcake and place on top of the layer of frosting.
the top

8. Flatten (gently smash) the top part of the cupcake inside the jar. You want to get the top sort of flat.
flatten the top

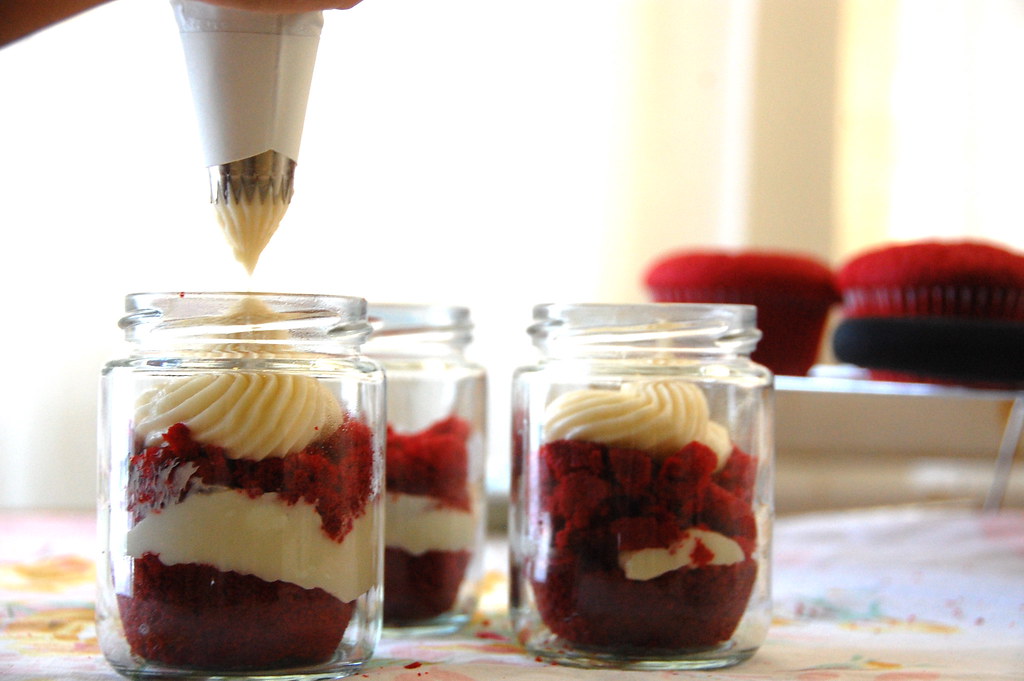
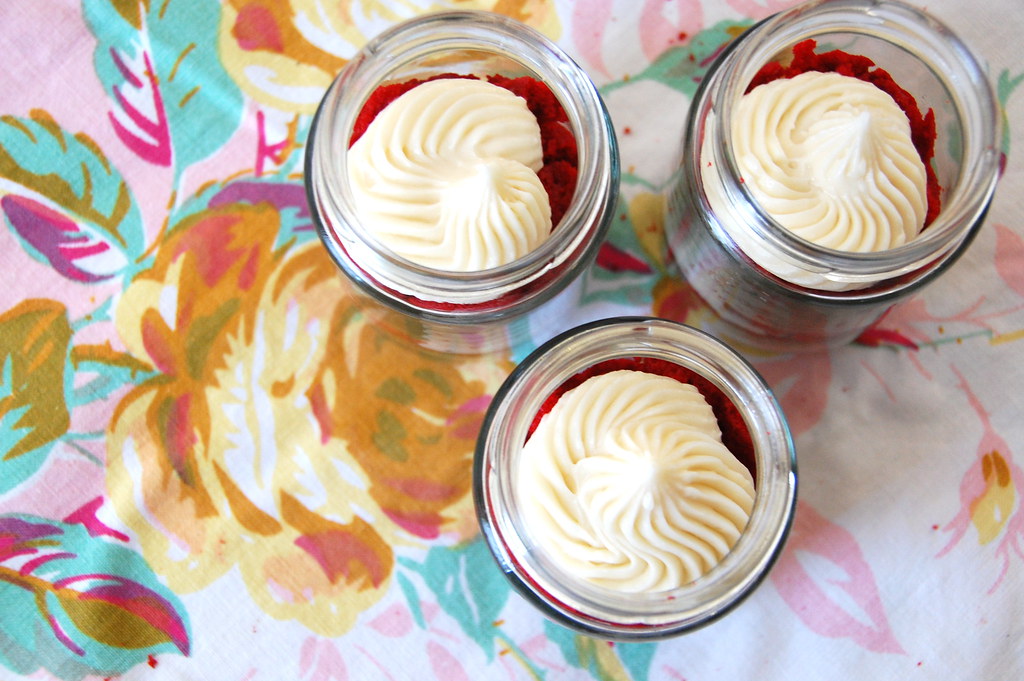
9. Beautifully frost the top of the cupcake.
pipe on the topred velvet in a jar

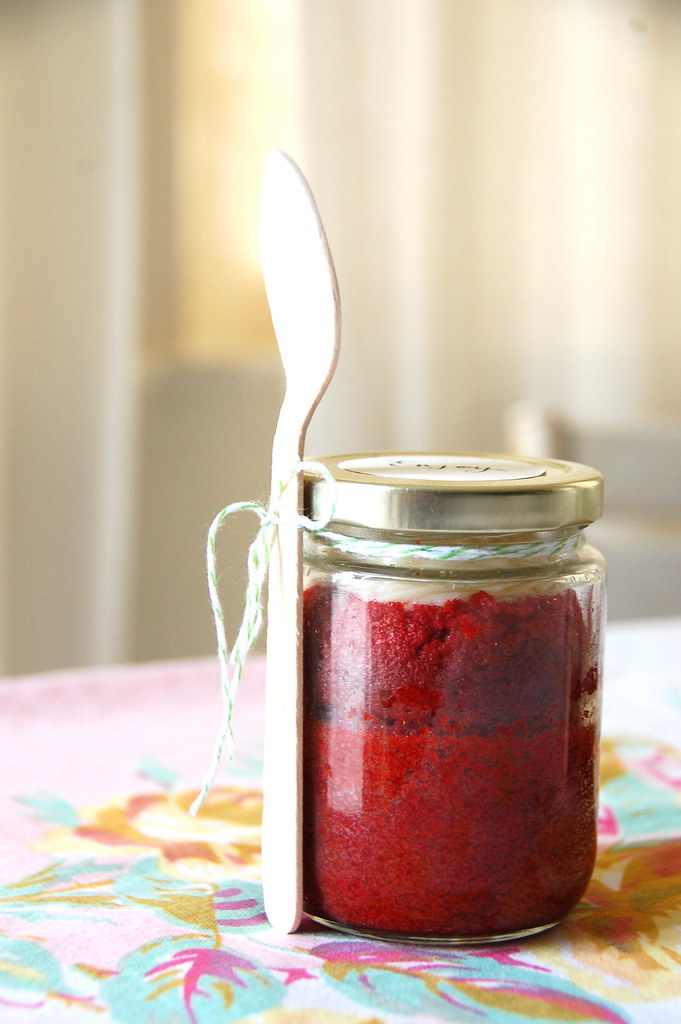
10. Cover with lids and package however you like!  b it is so yummy!
red velvet in a jar
Easy, right? See, I told you I am not a genius. I did also want to give a crack at actually baking it in a jar (crossing my fingers that I wouldn't shatter or explode in the oven) and it came out pretty good too.

I followed the instructions, but the lid I boiled shrank, so I just ran it in piping hot water right before I put in on the jar. Also, I let the whole jar cool completely, which was 2.5 hours. After it cooled, I opened the jar up, I scooped out a hole in the middle and then filled it with frosting. I finished it off by frosting the top too! Then, I sealed it again and packaged it to my liking. Something I would change next time I bake it in a jar, is to only fill it up a quarter of the way because it came up higher than I wanted it too.
cupcake in a jar
Just as cute and delicious as the other way of making it!